Saturday, May 31, 2014

June's Across The Pond Sew Along Project

June- Across The Pond Sew Along Project


Check out our past projects
                 What are we making this month in our Across The Pond Sew Along?
                                                
                                                      Needle cases!!                       
 If you are like me, you are always forgetting where you left that tiny,  little needle... even if it was just a few minutes after "sticking it in a place  so I won't forget where I put it!"
A needle book or needle case is perfect for storing my needles, and for keeping track of them... in such  cute and fun ways.

I'll share a few  of my favorite  patterns to make a needle case, if you need some ideas . 

Amanda,  The Patchsmith,  has lots of ideas , too, and she shares two delightful needle cases that she made, on her blog.  

Hexi Needle Case:    by My Three Sons


Amanda, The Patchsmith  made this sweet Hexi Needle Case
 using the pattern by My Three Sons
I love how Amanda personalized this hexi!  I know that I 'll be trying this one out soon!


Flowerpot Needlekeep Free Pattern:     by Lynnette Anderson


Flowerpot Keep   by Lynette Anderson

Linen and embroidery... how fun!

Needles Home:   Sulky


Needles Home   by Sulky
This is a cute , felt fold-up book.

Needlebook Tutorial:  Nana Company

                                   
Needlebook Tutorial   by Nana Company
This one is a favorite of mine already.  I made one of these recently, as a gift to include with a swap.  It is a great way to use up special fabric scraps.


Nana Company  Needlebook    by Susie's Sunroom
I "jazzed up " the back cover, to match a skinny pincushion that I made for the swap.


I put a pinwheel on the back cover


It is fun to add ribbon and charms for embellishing the felt pages
Bird  Needle case:     by Heidi Boyd   on Craftsy  (part of Sewing Kit Trio)
                                               

Bird Needlecase        made by Susie's Sunroom


This is a bird that is folded up, over its tail.    I thought he needed an eye, so I added a bead for a bird eye.  


His tail  has felt for the needles

Opened up
I used two Joel Dewberry "Bungalow"  fabrics, which were  included in the kit with the directions.    After I got the pieces cut out , this bird needle case went together quickly.                              
This little pair of scissors can fit under the elastic, too
         
We do you hope you have found a pattern that looks fun , and you'll make your own needle case, and put it in the Across The Pond Sew Along Flickr group to share!

These needle cases/books are a lot of fun to make... you know you'll be seeing a few more   lots more in the future!!

I'm off to my sewing room!


Friday, May 30, 2014

Mixing It Up

Sew Kitschy Block for May


BoM  at Quiet Play blog
May's "Sew Kitschy" Block Of the Month is a favorite of mine....  it is a mixer in Betty's kitchen. It will be a free download until June 1,  at  Quiet Play's Craftsy shop.   
                                             
Mixer paper pieced pattern    and  rest of the patterns in the BoM at Craftsy


My mixer in sections           Susie's Sunroom

And here is my jaunty little mixer ,   all sewn up!


May  Sew Kitschy BoM                   by Susie's Sunroom


I tried something a little different on the mixing bowl.... I used the wrong side of the  fabric,  for the inside of the bowl.   I plan on quilting the outline of the whole mixer and bowl at the end,  and this should make the mixer pop out.  


Shhhhh......
Ooops!  Pretend you don't notice that the fabric is Right Side in between the beaters!!
{Of course I noticed this AFTER the block was all done!  }


My completed Sew Kitschy blocks  so far                        
My bunch of blocks are looking bright and cheerful now.... even on a dreary day.

I am linking up at:    Sew Kitschy May Block @ Quiet Play blog   and
                              Paper Piecing Party @ Quiet Play blog  and
                              Can I Get a Whoop Whoop @  Confessions of a Fabric Addict

I'm off to my sewing room!

Tuesday, May 27, 2014

New FWSQ Blocks and a Swap at Amy Made That!

FWSQ Blocks   .... and a Swap At Amy Made That!


I am having fun adding to my Farmer's Wife Sampler Quilt block pile.... slowly but surely.


You can see the blocks in more detail... all together  Here
The first new block:   #21  Contrary Wife


FWSQ Block    #21  Contrary Wife       by Susie's Sunroom
This was an easy block to make.  I feel like this is another "classic " block  from the book,   that I finally got to make!

And I liked the color combination so well, that I used the same fabrics for block #22...

Block #22 Corn & Beans:


FWSQ block #22  Corn & Beans    by Susie's Sunroom
I was happy with all of the little triangles,  using the paper pieced pattern.  I did have to make two copies of the pattern,  and use  various pieces of both papers to put it together in a way that I could envison.  (Maybe my brain doesn't work the same way as the pattern designer....when sewing  the pieces all together again!
                       It  surely would've been  "succotash" if I didn't do it my way!!


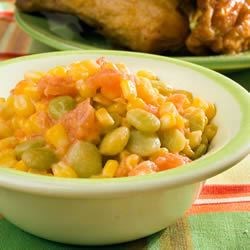
Corn and Beans Succotash
Ok,  you can stop groaning now.... I apologize for that one!  Back to the Farmer's Wife Quilt Sampler blocks....

FWQS blocks  #21  Contrary Wife  and #22  Corn & Beans       by Susie's Sunroom


Progress on the blocks
Check out more blocks at the Flickr group  (click here)  and my blocks (here)


The SWAP  ALERT:

And now,  in case you didn't know.... there is a really fun swap going on again at my sister's blog,  Amy Made That!     Guess what the swap item is this time? 
                                     Needle books !!       Here are the details from Amy :
                                                  
Amy Made That! blog
                              "Need A Little Needle Book Swap"
                            
Amy made this needle book.....  this tutorial at Nana Company
sign up at:  
eamylove@aol.com


Amy's GUIDELINES:

1. Join the swap by May 31, 2014.  
All you need to do is send an email to me at
eamylove@aol.com
with your mailing address.


2.  Let me know if you could do an international swap,
or if you prefer to stay within your own country.
You can also let me know if you have any preferences of colors
or styles you would like to receive from your partner.

3. I will assign you a partner. My target date is June 7, 2014.
You will receive an email from me, near that date.

4. It's up to you, whether you would like to keep your identity
from your partner, or would like to contact her to get to know her tastes.
Either way is fun!

5. Create a needle book for your partner and mail it out
by June 30, 2014.

6.  Feel free to include any extras your partner might enjoy...
sweets, sewing notions, fabric scraps or another handmade item.

7.  Have some fun posting pictures on your blog or on Flickr.
You can give sneak peeks or just go ahead and show it all.
It's fun to get inspiration from others.

8. Reach out to me, via email, if you have any issues.
Things happen...and sometimes we need a little support
or just can't meet the target date.
I can contact your partner to let them know to be patient...
something good is about to happen.

9. If you need to bow out gracefully, that's okay, too.
No stress permitted in this swap!

10. Above all, encourage one another.
Make new friends with your fellow swappers,
visit their blogs, comment on their photos, and enjoy the group.

So, now...we need a little information...
just what are we swapping???

A needle book is basically just 
a pretty little sewing booklet 
with pages of fabric or felt,
for keeping pins and needles safe and handy.

I had so much fun making this same  needle book, as an extra goody gift, in the  swap,
The Skinny Pincushion Swap, this past March .  (It was the first swap that Amy hosted. ) I believe that over 50 quilters swapped the skinny pinnies!


These are so dear,  and can be customized in a million different ways.   Look what I did for the back of this one....


Skinny Pincushion   and  a coordinating needle book 
So, if you'd like to make a new quilty friend or two,   maybe even  from another country,  hurry and sign up before  May 31 !  That's this Saturday!   It is sew fun to make something for a new friend, and then to get a nice surprise for yourself in the mail!  These really do not take a long time to make, so it is a fun summertime project to make.


Speaking of swaps....that reminds me....very soon,  I'll be sharing about the most recent swap that I have been in.   It is called , The Springtime Flowers Mug Rug Swap.... hosted by Michele at Quilting Gallery, with the mug rugs designed by Amanda,  The Patchsmith!    I am just waiting (eagerly) for my partner to send me my package, and then I will post about this swap! 


The Patchsmith blog


Won't you join in with us, and be in the  "Need A Little Needle Book Swap"  ?!
                                            
Inside of my needle book 

I'm off to my sewing room!

Saturday, May 24, 2014

Patchique Blocks 30 and 85

Patchique' blocks 30 and 85


 It's been another fun  ( and rewarding )day while making the next two Patchique' Blocks!

Making patchwork and applique' blocks,  along with The Patchsmith, from the book   "Japanese Taupe Quilts", by Susan Briscoe
The patchwork block:   # 30  Kasane itsutsu me  (Five layered squares)


Block #30  Five Layered squares  from Japanese Taupe Quilts book
  
It is made up of 29 pieces of fabric.... not  5 bigger squares.


Block #30  Five layered squares     by Susie's Sunroom
 It is really very pretty (in real life), with subtle browns and a muted red. (Love ya Moda Fabrics!!)

The Applique' Block:  # 85  Hanakaku  (Flower square)


Block #85  Flower Square   from  Japanese Taupe Quilts  book


 My #85 Flower Square block:


Block # 85  Flower Square   by Susie's Sunroom
This block actually reminded me of an  crochet  Granny Square.   And it was another opportunity to make a yoyo for the flower center!


Blocks # 85  and # 30

And here is a picture of the completed blocks so far:


28 Japanes Taupe Quilts blocks finished so far!  (No we aren't making all of them!)


Hoping you have a great Memorial Day weekend.    I am so thankful for all of those that have  lost their lives in  military service for the United States.  Thank you to those who have risked their lives to defend us all.


I'm off to my sewing room!
Linking up at:   Fabric Frenzy Friday @ Fort Worth Fabric Studio


Monday, May 19, 2014

Another Two Zip Hipster

Customizing a Two Zip Hipster bag

 I love making bags for my daughter.   She usually looks through my fabric and picks out fabric that she wants me to use for the project.   A few years ago, I made up my own messenger bag pattern for her .  She wanted a large size, and an over-the-body strap.     Here are the two bags I made for her:


Chrissy's Messenger Bag  in Pink  and  gray and green

Chrissy's Messenger bag   in Sherbit Pip fabrics!


The last time she was home, she  found some cute fabric, in my stash, and asked me to maker her another messenger bag.... and I suggested a few new features .  The  fabric is really fun... Type Fabric  by Julia Rothman Windham Fabric


Type Fabrics   by Julia Rothman   Windham Fabric
After I studied my own pattern,  I realized that I  could use a great pattern that I already used  ,  the Two Zip Hipster, by Erin Erickson ( at Dog Under My Desk).  (Excellent directions and pictures!!)


Two Zip Hipster   by Dog Under My Desk   pdf  available  here
                                           

 Some of you may remember that I made a  bag for my tablet, on an earlier blog. I knew I could simply modify it for the specific features my daughter wanted.  ( I found the Two Zip Hipster pattern long  after I made the two messenger bags for her.) 

A tote for my tablet          Two Zip Hipster    made by Susie's Sunroom
 

So what I basically did, to make this Two Zip Hipster into a  custom Messenger bag:
  • Added an outer front flap with a magnetic snap
  • Enlarged bag dimensions-  2 inches taller,  2 inches wider and 2 inches deeper
  • Inside pockets-   2 - 6 inches wide x 7 inches tall pockets Plus a zipped lining pocket
  • Strap-   44 inches long x 1 1/2 inches wide
  • Place the outer zip pocket and slip pocket on the Back of Chrissy's bag {featured on the front of Erin's Two Zip Hipster bags}  (see above)


 Chrissy's customized Two Zip Hipster:

Chrissy's  modifed  Two Zip Hipster

The back side .... with a slip pocket AND a  zippered pocket


Zippered pocket on the back


See the slip pocket, right above the zippered pocket.  

Had to show you the cute lining in the  outer slip pocket on the back, too!

The front side with the flap


Paper clips lining, in gray

INside:  Slip pockets on both sides, with an added zippered pocket in the lining


"The quick brown fox jumps over the lazy dog. "
My daughter is getting her PhD in Linguistics... isn't this fabric so appropriate?!
                                    { She loves her bag. }
I'm off to my sewing room!