Saturday, October 12, 2013

A Strawberry Delight

A Strawberry Swap
                                            
Strawberry pincushion swap    photo  by Erin @  Why Not Sew

Recently, I was reading the blog Why Not Sew  , by Erin, and saw that she was making strawberry pincushions.    She made soooo many beautiful strawberries, that I couldn't pick just one out as a favorite ! (This is where I kept squealing out loud with glee!)   Her post gives inspiration, great tips and excellent resources  for making strawberry pincushions .  

At the end of the post, she asked if  "anyone would be 'interested' in joining" ...
                  a Strawberry Pincushion Swap with her...  
                              What do you think I answered?  
                                                               *hint below* 


photo from  my post in the  Pin It Pincushion Blog Hop  Sept 17
YES!    I'm in!!  I love making strawberry pincushions!

Erin (one clever and talented quilter )  then created a Strawberry Pincushion Swap group on Flickr.  Everyone in the swap can look there and see what other participants are making. But we didn't know who was making a strawberry for ourselves.  My sister, Amy, 
joined in the swap , too, and we had so much fun looking at the pictures and guessing who our secret partners were.  (We didn't get each other... that would've been fun!)
The strawberry I made for my partner              
I decided to make my partner a strawberry,  using the pattern "Strawberry Shortcake" by Fig Tree & Co. It has an fabric cap, embellished with a  vintage style button.  I filled the pincushion with crushed walnut shells kitty litter. Then,  I found some coral/pink tiny glass beads to sew on, in the center of each of  the little rose clusters on the fabric.  This gave the fabric a little bit of sparkle.
Strawberry pincushion  in  Fig Tree fabrics and tiny glass beads
 I also wanted to add something that coordinated with the berry's fabric, so I decided to make her a patchwork fabric basket,  from the tutorial by  Ayumi @ Pink Penguin. This is a sweet little basket that I love.  I used some Fig Tree & Co. fabrics from my stash, cut into  2 inch squares, and white Brussels Linen, for the outside.  I made the lining from scraps of bigger pieces that I had.  


A Patchwork Fabric Basket    tutorial  by Ayumi at Pink Penguin


See the strawberry's fabric in the basket patchwork....
The last step was to gather up a few goodies to put inside the basket, with the little strawberry..


I made a key fob , in a strawberry print,  and added some pretty feather pins
 Everything got wrapped up and sent to my swap partner....  Gina .
I was thrilled to be making my strawberry pincushion for Gina, because she has been a fellow paper piecer in the BoM  And Sew On, by Kristy @ Quiet Play.  I have admired her sewing and artistic style for a long time now!  I also squeal over her beautiful sewing projects!  If you'd like to meet Gina and read her fabulous blog... hop over to Party of Eight .

Well that accounts for half of the swap fun.... now it is time for me to share with you what I received from my partner who made the strawberry pincushion for me!

Before I show you what arrived from NEW ZEALAND.... tell your family to cover their ears , so that any loud squeals won't hurt their eardrums!  My secret partner was Wooden Spoon, aka Rachel!


My  gifts from Wooden Spoon... strawberry pincushions, card and adorable needlebook! 
These are sweet enough to gobble up and eat!  I love the fabrics she chose and the precious details she put into everything!  


The felt caps have embroidery on the flower and leaves and a button


They are so cute and classic, hanging on my shelf in my sewing room
Opening up the needlebook  .... love the twill ruler ribbon and polka dots!!


The needlebook is made with the cutest bunch of fabrics... in little 1 inch squares! It makes me happy to  just open it up!  (Uh- 0h.... I can foresee a new addiction coming on in the near future...)

Berry Sweet swap gifts
Lucky me... what a super fun swap ! Thanks so much, Rachel , for my beautiful swap goodies!  This has been oneof my favorite experiences in my sewing adventures!


I'm off to my sewing room!

Tuesday, October 8, 2013

Best Friend Block {Modern QAL}

October's Modern Blocks Quilt Along Block

So far in October, I have been working on making blocks. I am eager to improve my technique and skills for assembling all kinds of blocks , in different styles.
                                             mbqal
For the Modern Blocks Quilt Along Block~    
Amy,  at And Sew We Craft who hosts with the  link- up of block pictures,  reminds us that we are now half way through the year of BoM's already!   

This month's block tutorial  is presented by  Anorina,  at Samelias Mum blog.   
                  
Best Friends block  made by  Anorina @ Samelias Mum


Best Friend block-     is designed by Angela Pingel  in book  ( page 20)  Modern Blocks  compiled by Susanne Woods

I learned how to make a partial seam block in the Best Friend block.  

My block~    
Best Friend  block    made by Susie @ Susie's Sunroom
And here are my six blocks so far in the quilt along~


6 months of the Modern Blocks Quilt Along so far.... Susie's Sunroom
After seeing them together, I decided to remake last month's Esclator block in different fabrics.  (on top row, far right)   My original plan was  to use my fat quarter bundle, Stitch Floral Square  by Michael Miller , which has the red, dark blue and brown fabric.  I  now want to focus on the other colors ....

Adding the new Escalator block in~
6 months of the Modern Block Quilt Along blocks      Susie's Sunroom

I like these better.  Maybe I''ll make a quilt at the end of the BoM.


Best Friends block                 Susie's Sunroom
I enjoyed making this block... it'll be my bff this week! 

I'm off to my sewing room!


Friday, October 4, 2013

Acorns

Acorns and Pins
                                                        
Acorn Pincushion    pattern by Susie's Sunroom

This week, I was  "on pins and needles" at times,  while making up my own pattern for a fall pin cushion.  I  wanted to sew a little acorn for the top of a  small pin cushion for the fall season . Looking around  I found a few applique patterns online, and then I got the idea to try to make up my own, very simple,  paper pieced pattern.  (I am stressing simple... this is my first attempt at a paper piece design,)

Acorn Block  # SS01:  click  here for a  paper pieced  pattern  - a 3 1/2 " square block
            (free)
                                                  
Acorn pincushion   acorn design by Susie @ Susie's Sunroom


 Basic Tutorial  of how I made my little Acorn  Pincushion:  

Dimensions:       3 1/2 inches  x 3 1/2 inches x 2 inches high

Fabrics:    fall colors -various  scraps ( from my Tumbling Leaves table runner  ) Tic Tac by Andover
               background fabric- for top and bottom pattern
Side gusset:  cut piece  14 in long  x 2 1/2 in wide
Stuffing:   polyfil  or  ground walnut shell kitty litter  (I use Blue Buffalo) 


  • The top and the bottom of the pincushion are the  3 1/2 in  x 3 1/2 in   acorn blocks.
  • Make a top and bottom acorn block.  Remove the paper from the back after completion of the block.  
  • The side is a gusset  ,  which is sewn to the top section first. Before sewing,  I laid it out  and pinned the gusset to the outer edges of this acorn block, RST aligning raw edges,    so I could see where to sew the gusset ends together.  There are corners where you can "give and take" or round off or add a little pleat, to make it fit. Just plan ahead!  Attach the gusset all the way around , after having  adjusted the length and sewing the ends together to make a loop.
  • Then I pinned and sewed the bottom block to the remaining raw edge of the gusset.  LEAVE a 2 inch opening for stuffing the pincushion.  


  • Turn the pincushion right side out, press it a little, and fill it.  I use a funnel to add my crushed walnut shells, propping it up inside of a Rubbermaid  container (to catch any spilling!)  (I do spill a lot!)
  • After it is nice and plump , ladder stitch or slip stitch the opening to close it.  


Please note:  in the picture above, you may notice some  pieced sections in the body of the acorn (brown-gold color A and B). This is because I patched  my scraps together to make it big enough to sew with. ( I am saving that fabric for something bigger to make later!)  
A is one piece of fabric in the pattern.  B is also one piece of fabric


Acorn Pincushion     Acorn Pattern  by Susie @ Susie's Sunroom


I had fun making a little seasonal pincushion, and would love to know if anybody makes one of their own!
Email me and let me know.  (I can add a Flickr group if we get a few to share!)
And email me with any questions or if you discovered any errors...


I'm off to my sewing room!


I am linking up to~
and

PS      
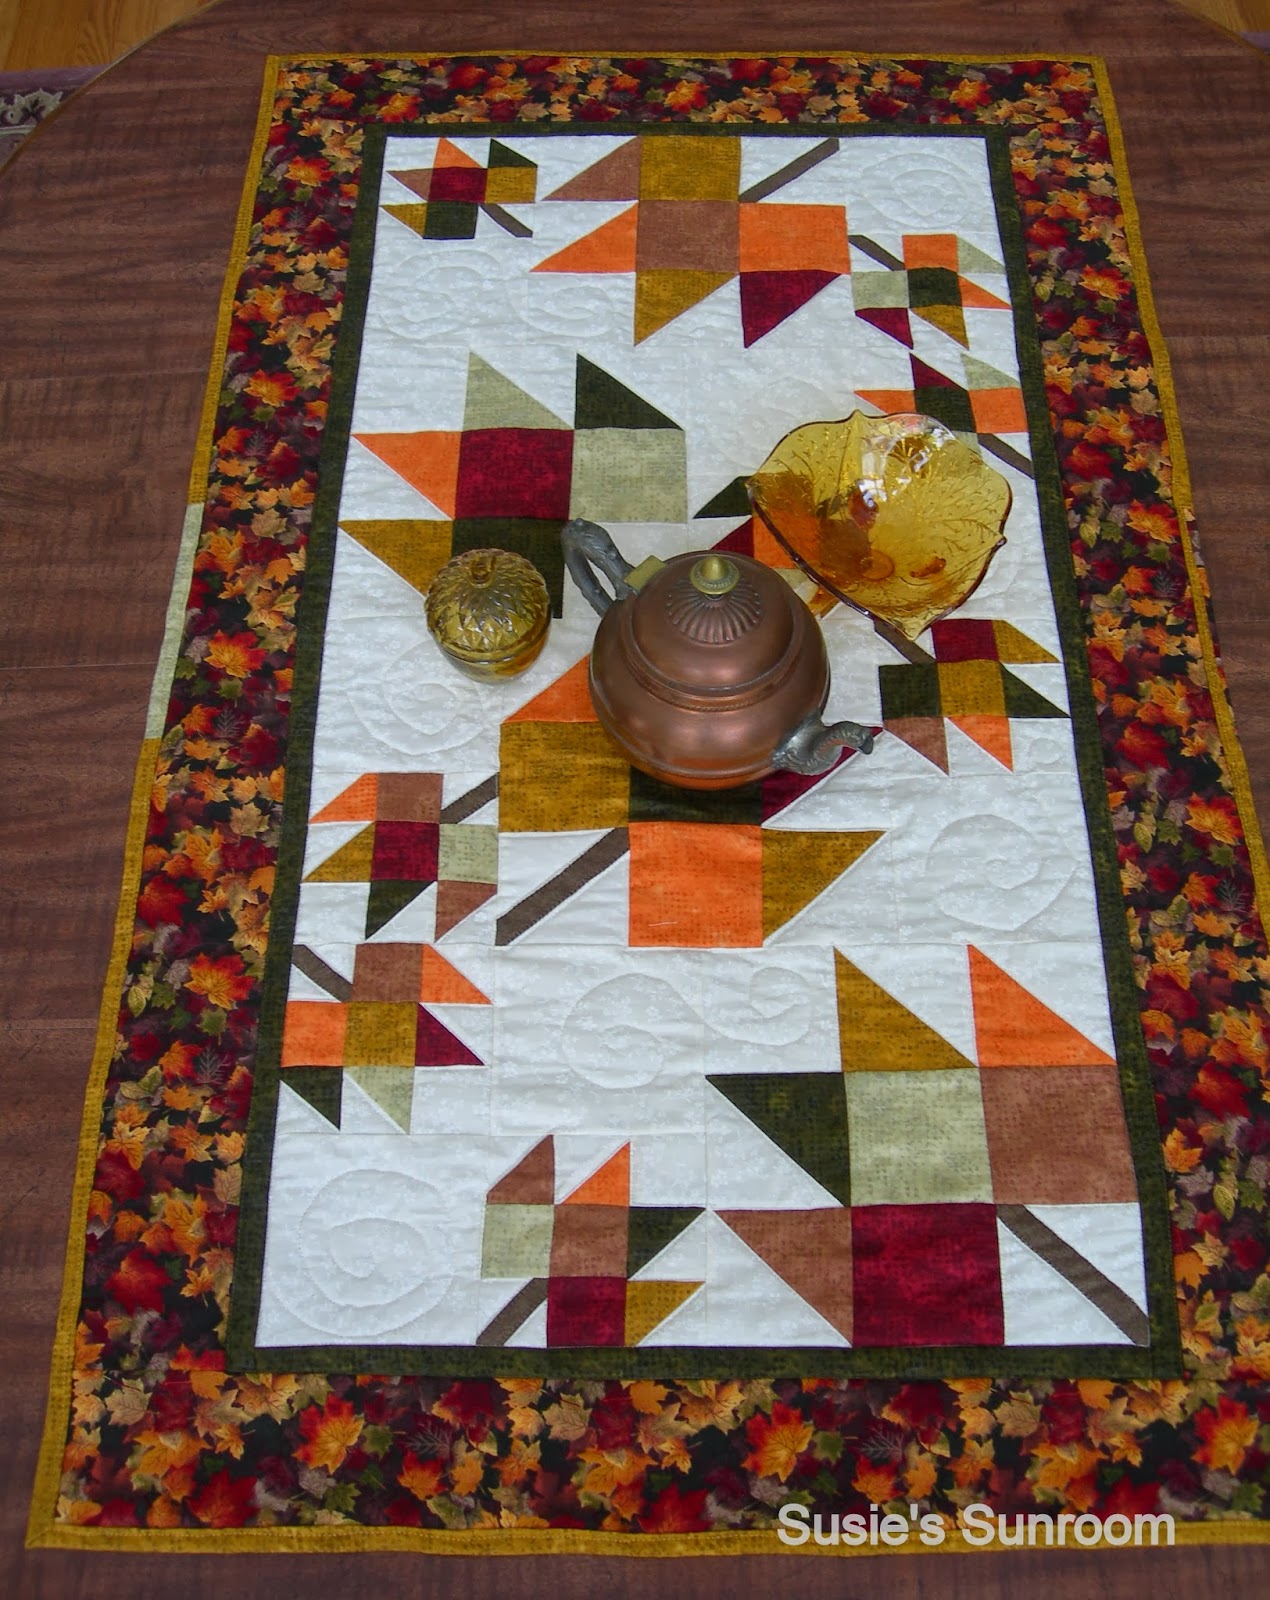
 Amy, my sister,  suggested  that I enter my Tumbling Leaves table runner in the Quilting Gallery's  Fall's Glory Quilts Vote and Giveway this week.  If you click HERE,  it will take you to Quilting Gallery and you can look at all of this week's entries for Fall's Glory quilts. You  can vote for up to 3 quilts that you like the best.  I am the last entry... at the end.   
  • Voting is open Friday to Monday, October 7, 2013 at 6:00 p.m. (EDT)
 I would gladly accept any quilt love going my way!


Tumbling Leaves table runner at Quilting Gallery  Fall's Glory Quilts