Tuesday, January 7, 2014

Claiming my blog (again!)

Doing some re-claiming

Some of my regular followers have mentioned that I have not been showing up on the new post listing on their Bloglovin'. 

So I read somewhere to try "re-claiming" my blog on Bloglovin'.

I hereby do RECLAIM  my blog !


<a href="http://www.bloglovin.com/blog/3979412/?claim=3h36u5p5np9">Follow my blog with Bloglovin</a>

Since you have been so nice and read down this far.... here is a sneak look at my next project....

A little piece of it...
I will post about this cute little project later this week.  After that comes out, please let me know if you are not getting my new posts... and by which method you get notified.  Thanks so much!

I'm off to my sewing room!

Saturday, January 4, 2014

Keeping Up With Patchique'

Keeping Up with Patchique'

Patchique Quilt Project with The Patchsmith


I spent a relaxing afternoon working on  the Week 6 Patchique' blocks.  (Most of the time was relaxing, but there was a point that was stressful  while I was trying to line up 49 little blocks...)

Block # 11:    Kasuri koshi  (or Kasuri check)
                    
Block # 11    photo by Susan Briscoe  in book page 41


This nifty little 9 1/2  inch block has 49 little blocks in it!!  Those are checks I'm supposed to make. 
One year ago, I probably would've "passed" on this block. 
But this year, I am determined to stretch and grow... and so I fearlessly follow my talented leader, Amanda, The Patchsmith, as she helps find easier and more practical ways to create the trickier  Japanese Taupe Quilt blocks.

Amanda diagrammed -out how to make 2 different rows of strips, and then how to cut up these rows, and combine them in a way that was easier than putting 49 little pieces together.  (see her blog post HERE.)  

I tried to be very exact in sewing my strips together, and to use an  exact scant 1/4 inch seam allowance,  and not to stretch my fabric by pressing seams early...  and managed to match " a lot of the  seams ."   I used my seam ripper (Cruella DeRipper) a bunch, but I didn't curse , because I made those seam stitches looooong in length (and  therefore easier to rip out !)   Besides, Amanda said this block is "fiddly" and she won't be making this block again!  

So be kind when judging this block.... I am still learning!  

Block # 11  Kasuri koshi ( Kasuri check)  by Susie's Sunroom
I can live with this block.   I do love it's colors. It is even prettier in person. It is strangely calming!  (Maybe because it is DONE !)

Block # 78:   Rokuyo  (Hexagonal flower)

Block # 78  block by Susan Briscoe in book , page 80

This applique' block was fun to make.  The book has a pattern that is one quarter of the design, and I had to fold the Heat n Bond lite , and cut out the  flower shape design as if making a snowflake  ( on 2 folds.)

Block # 78  Rokuyo  (Hexagonal flower)     Susie's Sunroom


I did not  sew accents stitches  on the center of my flower, as the red fabric has the "stitch marks" printed in the fabric.  I did blanket stitch around  the outer edges of all of the shapes.  

Here is the composite chart of all of my  finished Patchique' blocks so far:

Susie's Sunroom   completed  Patchique' blocks so far
My completed Patchique' blocks so far     12 completed!


Remember when I mentioned  in the last blog  , that I would like to make another Scissors Keeper from a pattern that I saw?  Hint:  It was a strawberry ...
Strawberry Scissorkeeper    photo by Red Brolly blog


Well, I did make this little cutie...    A Strawberry Scissorkeeper   by Bronwyn  Hayes at Red Brolly blog.

A Strawberry Scissorkeep   pattern by  Bronwyn Hayes at  Red Brolly


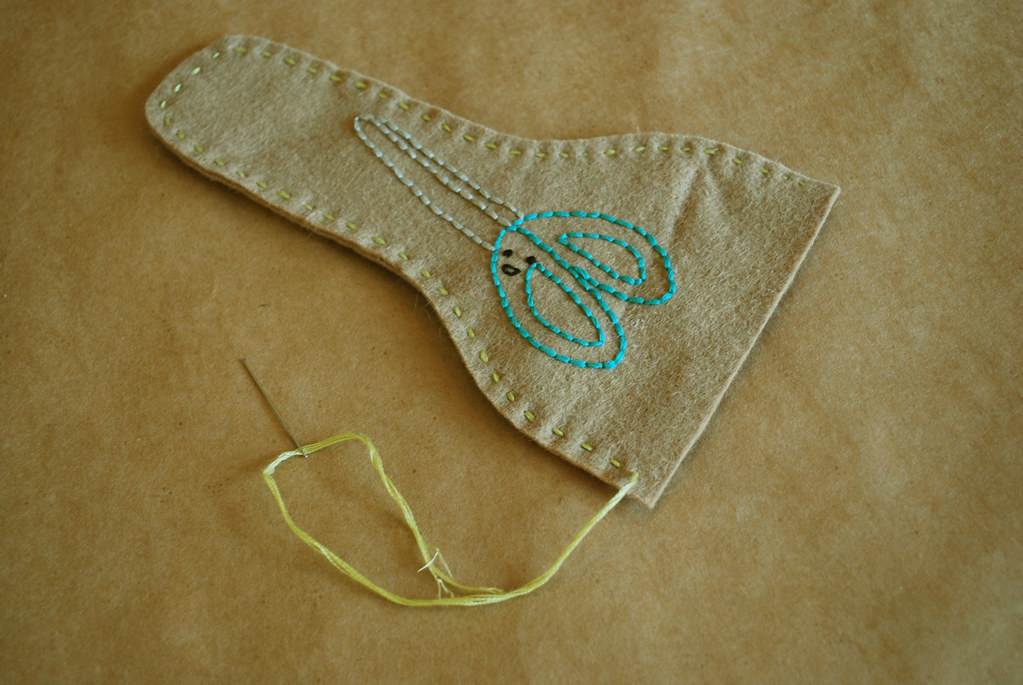
I was gathering my felt and  embroidery thread up for this project, and dumped a big pile of different threads out of the bag.  Guess what I found hidden  in the pile?  This cute little pair of embroidery scissors!  I obviously bought them a long time ago, and had completely forgotten about them.  (Yay....  a late Christmas gift to myself!)

Changes and observations:

  • I simply enlarged the pattern , at 120 % , on my scanner, to get the pattern to be large enough for  these 5 inch scissors.

Strawberry Scissorkeep       design by Bronwyn Hayes
  • I omitted using the Heat n Bond fusible that the pattern calls for.   I just made sure I sewed the pieces together securely.
  • I didn't want the little ribbon hanger at the top, so I omitted this.


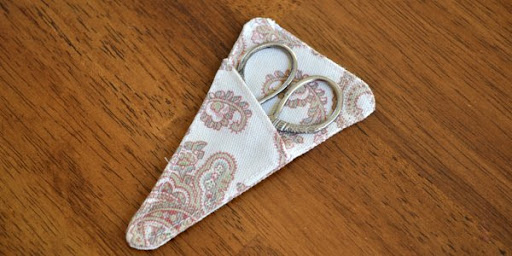
Lift the strawberry cap up, and slide the scissors in

  • This project was really fun to make!  I didn't use the sewing machine at all.  The embroidery touches are simple and quick.  And it was easy to sew the little glass beads onto the felt front.

Have you made any kind of scissor holder yet?  
 If so,  share them  by linking your photo at our Flickr Group !  Amanda, The Patchsmith, has added her sweet and functional scissor holder pictures to it.   You can see the other Across The Pond Sew Along projects there as well.


I will most certainly make this Strawberry Scissorkeep  again.  It simply makes me smile when I peek inside it and see those tiny little scissors. 

I'm off to my sewing room!

Wednesday, January 1, 2014

Happy New Year

starting off 2014 
...with January's Across The Pond Sew Along project


 Across The Pond Sew Along
Want to make something quick and fun? How about a scissors keeper ?
I have always liked seeing those cute scissors holders that are pictured on the net, but have not made one until now.

Maybe that's  because I am lucky to have a sister (who is  Amy of Amy Made That! blog), who  gave me a scissors keeper , along with a beautiful pair of Gingher scissors, one Christmas.


Christmas Gifts from my sister a few years ago
After researching some sites online, I found some really cute projects to make scissor keepers.  I like that there are lots of  different styles, to match different  needs and different tastes!
Here are some scissor keeper tutorials:

*  Heart Shaped Scissors Keeper Tutorial      by Handmade Harbour


Heart Shaped Scissors Keeper Tutorial   by Handmade Harbour   click HERE


*  Folded Fabric Scissor Holder - Rounded Top Version   by Vickis Fabric Creations

Folded Fabric Scissor Holder- Rounded Top Version   by Vickis Fabric Creations  
 Click HERE


*  Felt Scissor Case    by Wild Olive


Felt  Scissor case   by Wild Olive    click  HERE


*  Scissors Case Tutorial    by  Mother Huddle


Scissors Case Tutorial   by Mother Huddle     click HERE

*  Strawberry Scissorkeep   by  Red Brolly 

Strawberry Scissorkeep   by Red Brolly  click  HERE

*  Owl Scissors Case  In the Hoop embroidery   by Embroidery Garden  (for $4.99)

Owl Scissor Case   by Embroider Garden  (in the hoop)  click HERE

I noticed there are a lot of owl scissor keepers out there, and owl scissors!  They are so cute!  And,  I just adore that  felt strawberry scissorkeep....  I hope to make that  later in January. I'll show it to you, of course!

For today, I  decided to start out making my  first scissor keeper using the pattern ~
  Folded Fabric Scissor Holder - Rounded Top Version   by Vickis Fabric Creations 

photo by Vicki's Fabric Creations


  • I chose some  Queen Ann's Butterflies  from Alchemy  by Amy Butler, for the main fabric, and some cream tonal white for the back .
  • Then I enlarged my pattern (by Vicki Purnell) to fit onto a page of paper (7 1/4 inches across) 
  •   front and back fabric pieces  - 8 3/4 inches  x 10 1/4 inches
  •     Pellon 987 Fusible Fleece-  one piece  8 x 8     (this  leaves the bottom 2 inches with no fleece,  so there is less bulk when  folding the bottom point up)


My pattern was actually 7 1/4  inches wide (rather than 8 3/8 in)


Sewn together-  front, with fusible fleece, and back side

Vicki's tutorial explains how to fold over the edges, to make a total of 3 pockets.  You begin by folding the right bottom corner over to the far left side.

The first fold over looks like this.
Then , you fold it back to this new edge after making a crease ....


With the rest of Vicki's tutorial, I quickly end up with the 3 pocketed,  rounded top scissor keeper!


Note:  I did fold up the point at the bottom.   This was very bulky, and why I am using less Pellon 987 Fusible Fleece (none at that bottom edge ) the next time I make one . ( I even used a hammer to pound the fibers a little before sewing, to try to flatten the area out. I went slowly and even turned my wheel by hand for a few stitches. )

Folded Fabric Scissor Holder- Rounded Top Version       Susie's Sunroom
I added a little yoyo and bead flower to bring out some pink color in the butterfly fabric.  
It was an extra small yoyo, and I had some trouble making it.  Does anyone have any tips on making the small yoyo's ?  Are they harder than bigger ones?

(My confession:  I added beads to cover up some "less than perfect" yoyo gathering )


Size Comparison    
I like that it can hold my fabric scissors,  my embroidery scissors and a seam ripper, for traveling.   


This is an quick project, and would make a thoughtful gift.  You can easily  personalize it with an initial or a button or flower.  

I'd love to see if you make one.... you can simply add it to our ATPSA Flickr group, where we can all see any of the Across The Pond  projects that we have made.
And, If you want to see more  beautiful scissor holder ideas, hop on over to Amanda, The Patchsmith, and see her post.  Her scissors keepers are just beautiful!


As we say goodbye to 2013, and look forward to the new year...
I wish for all of you blessings,  happiness, and good health.


And may your bobbins always be full!