Showing posts with label The Sewing Loft. Show all posts

Saturday, November 1, 2014

November Across The Pond Project

November's Across The Pond Sew Along Project


Make fun things... sewing along with us!
You can join anytime!  Here are our projects

The season is changing, and the weather is getting colder.  Time to snuggle up with a quilt and a good book!!


And that brings me to the theme of this month's Across The Pond Sew Along project:
Bookmarks

The internet is full of lots of fun ideas for all kinds of bookmarks!   Here are just a few tutorials  to get you started making one of your own!


From The Sewing Loft Blog-       Be Mine Bookmark
Be Mine Bookmark  by Heather at The Sewing Loft Blog
I love the little patches that she made.  These don't have to be just for  Valentine's Day...


I am really excited to share this next pattern with you! 

From The Patchsmith-     Country Heart Bookmark     ... a brand new free pattern!!


Country Heart Bookmark
A free pattern, created for the Across The Pond Sew Along
  by Amanda, The Patchsmith

This book mark is just adorable!!  I love that you can use felt and fabric and ribbon... or all fabric!  And the pattern and directions are impeccably  written, in Amanda's Patchsmith style!    {click here for your free pattern}


And lastly, I 'll share my idea for a fun little bookmark, using scraps and selvedges:

Easy Print pdf file : click PDF


                                  Selvedge and Zipper Bookmark
                                                   by Susie's Sunroom


The Selvedge and Zipper Bookmark      by Susie's Sunroom

Click here to print a pdf file or save easily:    HERE


Materials:  felt 
                 Zipper parts (  these were cut off from other projects)
                 Selvedges     
My bag of selvedges

                 
Felt-   cut   2 pieces-   3 inches x 7 inches high

Zipper scrap -   pick a piece at least 4 inches long  

Selvedges-    pick out some  favorites from your bag of selvedges.  Look for pieces at least 7 inches long, to cover most of the felt
       * My bookmark used about 5 long selvedges per side.  I had to add some short pieces to cover the felt on selvedges that were too short.


1. Lay out your selvedges on top of one piece of felt.
 2.  Pin them in place, so the edges touch-to cover all felt.
3. Sew-  quilt as you go... I used a feather stitch on my machine.

 Now, lay out your selvedges on top of one piece of felt.  Arrange them so they make you smile when you look at them!

Pin them in place, so the edges touch and all felt is covered.

Now you are ready to sew them onto the felt.  You " quilt as you go" ... I used a feather stitch on my machine.  
                
I call the #27 stitch, in the second row, my "Feather Stitch"
- on my Viking Topaz 30

Lay the two felt/fabric pieces, with wrong sides together.

Trim around the edges, making sure that no felt shows.  Trim any stray threads.


Close up of the feather stitching.  You could use a zig zag stitch, as well


Insert the zipper scrap about 1/2 inch, in the bottom of the bookmark.  (Place between the front and back pieces of the felt.)  Check so that the top of the zipper shows on the side you are calling "front."  Pin the zipper piece in place.

Sew around all four sides of the bookmark.  I used my machine blanket stitch.  Reinforce the side with the zipper piece. ( I simply used reverse, and then forward again, when stitching on the zipper area.  Sew slowly over the zipper.)


The back side- the zipper sewed in between the layers;
the blanket stitch on all four sides

Trim away any stray threads and little sections of felt that may show.

Lastly, curl up under your quilt with a favorite book, using your new bookmark!


For easy printing or saving:  click HERE  for the  complete tutorial in a pdf file !


We'd love to see the bookmarks that you make!  Share them with us at our Flickr Group-
Across The Pond Sew Along Flickr Group

And you won't want to miss seeing the bookmarks at Amanda's  The Patchsmith blog   AND
Amy's   Amy Made That! blog!  They are sew creative and I love all of their work!!


I'm off to my sewing room!
I am linked up at:   Can I Get a Whoop! Whoop! @ Confessions of A Fabric Addict  and
                             Sew Cute Tuesday @ Blossom Heart Quilts  and
                              Fabric Frenzy Friday  @ Fort Worth Fabric Studio  and
                             TGIFF @ aylin-nilya blog    and
                             Sew Darn Crafty @ Sew Many Ways

Tuesday, July 1, 2014

July' s New Across The Pond Sew Along Project

July's New Across The Pond Sew Along Project


It's never too late to start in... make a project with us!!
See here what we have made so far in our Sew Along....{ there's no pressure}
July is here already!  This month's Across The Pond Sew Along project is....

                    Theme:   Red  White    &  Blue

You can make anything with some red, white & blue....  let your creativity flow!  

Would you like to see some project  ideas? 
That's easy!  Check out  The Patchsmith (Amanda's blog),  Amy Made That! (Amy's blog) , and right here, for some great red, white and blue  projects!


 Make a pouch!   

Pattern:   Twice As Nice Double Zippered Pouch   by  Geta Grama  
                                       at   Geta's Quilting Studio 

This is such a cool pattern.... inside is a zippered pouch as the divider!    I used lots of RW and B in this Twice As Nice Pouch

  Did you see the red and the blue zippers?  Got them at Zip It  etsy shop.  


Make a quilt  ( or take a block and make it into a pillow like I did!!)

Pattern:   Independence Quilt       by  June82000 Marcia Hohn  at Quilter's Cache

Independence Quilt   I want to make this some day!   

A Dandy block


Log Cabin block
Starflower block
Flag block

And....


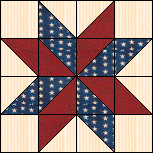
Block  I used:  Pieced Star    
Pieced Star   by  Marcia Hohn

I was happy to have some red , white and blue star fabric in my stash!!

Pieced Star  pillow                        by Susie's Sunroom


Next, I  added some red piping around the edges of this  12 inch  block, to make the inside pinwheel "pop."     I made my own piping... using this tutorial  and some Stitch Witchery , by Dritz  (5/8 in  width) ,  to press the bias tape around the 1/4 in cording .

(Don't look too closely at the piping... I need to practice   a little a lot going around the corners!!)  


The back......  denim material and the Covered Zipper Pillow Back.  
It's easy to make  using Amy's free tutorial  at   Amy Made That!


My Patriotic pillow      I love this block!                        Susie's Sunroom

Want to see another pillow idea? 
*Disclaimer*  It is hard to stop at making 'just one pillow'....


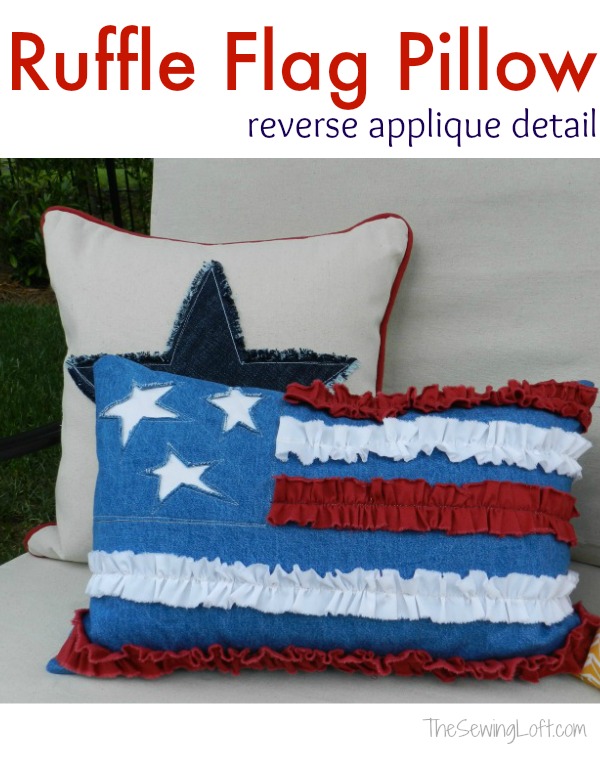
Pattern:    Ruffle Flag Pillow   (reverse applique detail)  by  Heather at The Sewing Loft

Heather's blog has a great tutorial showing how to make this cute ruffle flag pillow.  There is  even a video, that taught me how to do the stars in the reverse applique.   It was really a fun technique to learn!!  And easy.   I made this pillow in less than 2 hours.  Thanks, Heather !


Ruffle Flag Pillow    ( 12 in x 16 in )    made by Susie's Sunroom

I used denim fabric on the front, and some Patriotic fabric for the back.   


Of course I made the  Covered Zipper for the back !  A bit of denim scrap made the perfect cover for the zipper.


I'll just have to keep my kitty cat away from the little pieces of thread!!

When you make something Red  White and Blue,   you can link it up into our 
                           Across The Pond Sew Along Flickr group !   
(Just join the group  add your photos next, to your own Flickr page, and then add it into our group !)   

Oh,  and you can always add something that the Across The Pond Sew Along has made... at any time!   {No deadlines to fuss about! }


I'm off to my sewing room!