Wednesday, May 8, 2013

Thinking outside of the basket.....


Kitchen  mixer cover and a  basket


Last month, Diana asked me if I could  make her a cover for her Kitchen Aid Mixer .   And she wanted to know if I had any ideas for covering up a large box of plastic wrap that she keeps out on her counter.  I wasn't exactly sure what she was talking about, and asked her to take a picture of it and send it to me. Here it is.  
Plastic wrap box.....  14 inches across by 6 inches deep by 5 3/4 inches high
Wow! That's a big box!   I knew I had a paper pieced pattern for a Kitchen Aid Mixer already in my files.  The big plastic wrap box was going to require some thinking and some trial and error.  I got my regular muslin out, to use until I figured out how to make it!

I decided to start making the mixer cover first.  I knew that Diana liked neutral and brown tones in her kitchen.  And that her mixer is white.

The pattern:    KitchenAid  Cover  from  Sew-Ichigo blog
                      ... super cute!!
Photo from  Sew-Ichigo blog

Fabrics:   Moda  Primitive Muslin Time Worn   
               Lining-  JoAnn fabrics:  a text  and a bright orange
                Mixer-  Michael Miller  Pindots  Snow

KitchenAid Mixer Cover   made by Susie

Lining and  accent on the bottom edge
Lots of fun colors  on the lining


View on top....  the gusset

Now I had to make something work for that plastic wrap box.....
The first idea I tried, with muslin, was to make a simple bag and box- out the bottom.  Then I thought I would make a drawstring closure and just draw it up to the outer edges of the top of the box.  Diana needs to be able to pull the plastic wrap up, and slide the cutter across the whole top to cut the plastic off of the roll.   This didn't work.  

And then it hit me... I had been looking at basket patterns earlier this month, to find some fun projects for our Basket theme in the  May  Across The Pond Sew Along.  I ran across this cute basket pattern---   The tutorial is Geta's Fabric Boxes at  her blog Geta's Quilting Studio.
Geta' s Fabric Basket      Photo from Geta's Quilting Studio   


The pattern:    Geta's Fabric Basket   at Geta's Quilting Studio
The fabrics:   Moda  Primitive Muslin Time Worn   
                    Lining-  JoAnn fabrics:  a text  print

I made a practice basket from my muslin  ... using  Pellon FF 987  interfacing for stiffness.


This first one was too floppy with fusible fleece 


I taped boxes together to get the basic dimensions of the plastic wrap box
14 inches across by 6 inches deep by 5 3/4 inches high
I thought I was on the right track with my dimensions of this basket, after fitting in my model of the plastic box.   

The plan:  Make each side of the basket:   outer tan fabric and inner lining, RST sewn together.  After turning right sides out,  add a smaller rectangle of plastic canvas in the middle, to support the rectangle.  Simply sew topstitch along opening  to close it up.
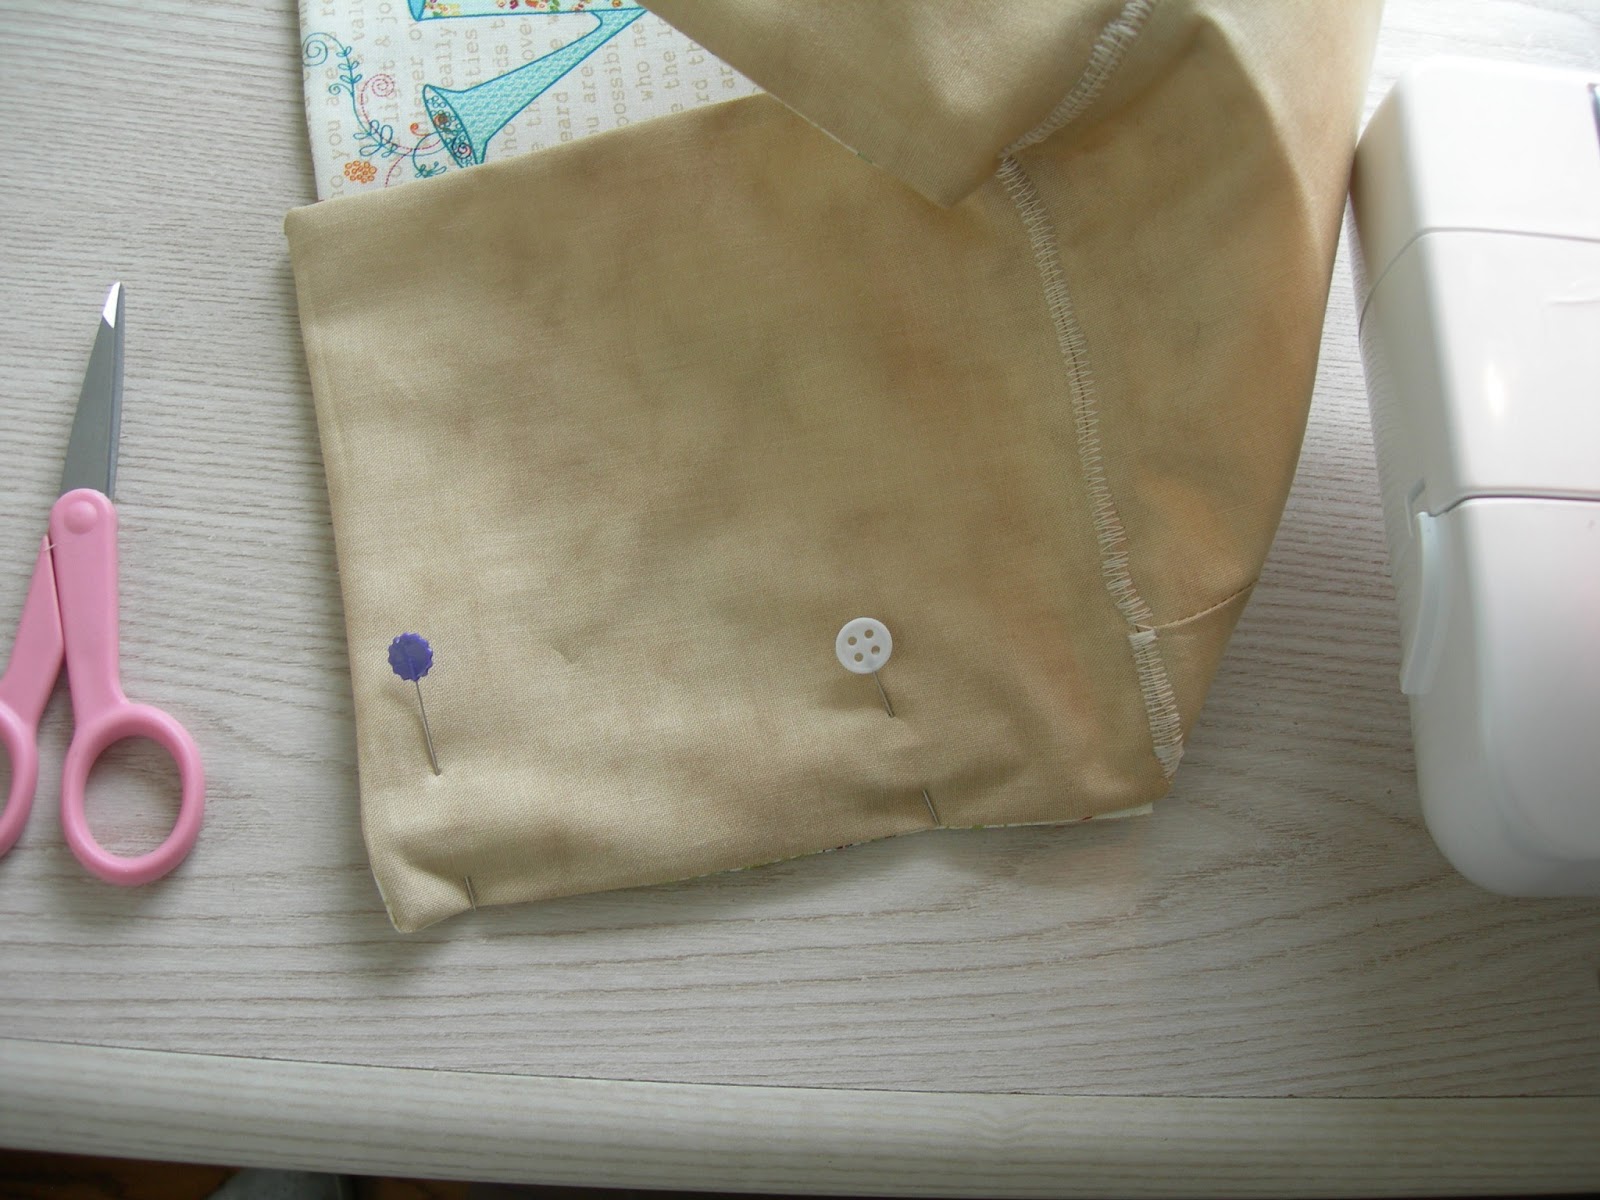
* I decided to not have the sides 'frayed', but to turn them out after sewing, so that the stitching would be stronger .  The plastic wrap box will be moved around a lot when being used.

Sew all pieces to the base of the basket, using wide zig-zag stitching
Zig-zag stitches to attach side pieces to the base
You can see the zig-zag stitching here


Yay!  The plastic wrap box should fit into my basket.  There is a little give and take  with it....


I made a lid , but left it detached.  Then she can get the plastic wrap out and cut  without being hindered.


Here they are in Diana's kitchen !

The lid is reversible


We'd love to have you join in and make a basket, or two,  with us in  our fun and casual Across The Pond Sew Along group.   If you want to make a basket, and need an idea,  check out our blogs:  


Amanda at The Patchsmith


Amanda at The Patchsmith


Amy  at Amy Made That!


Amy  at Amy Made That!


Susie at Susie's Sunroom


Susie at Susie's Sunroom


and our Flickr group  .  Add your picture to the group!  
Baskets make a cute gift for Mother's Day....


I'm off to my sewing room!


Wednesday, May 1, 2013

A Tisket, A Tasket....

May...brings a new  Across The Pond Sew Along Project
Join in with this month's fun project !

May has arrived, and it's time to tell you what Amy , of Amy Made That!   has chosen  for this month's sew along project.

The project:  Baskets  

I don't know about you, but I LOVE baskets!!  They rate right up there with my faves....  mug rugs, tote bags, and pouches!!  

I not only adore baskets, but actually use them around my house.  I'll share  some tutorials and directions for  a few different baskets with you during May.


I made this Fabric Basket     Tutorial by Ayumi @ Pink Penguin
This is a little Fabric Basket, made with linen and  my scraps.  Ayumi wrote a great tutorial at Pink Penguin blog.  

The inside
After I made this basket,  I decided to change the dimensions to make another one to hold Whiskers' cat treats.  It is more of a square, and holds 4 pouches of treats.

"I'd like this one now, please....."


The cat treat  basket

One day, I saw some blogs showing how to make a string block.  I thought it would be cute  to make a small basket with string blocks.  


3 Mini string block baskets  (across the front ) ....(the  Pink Penguin basket is in the middle back )


Making  a mini string block basket: 
 I combined  the tutorials of  Ayumi @ Pink Penguin
and   Sukie @ Sukie (sukieDontYaKnow.com) .  Sukie made a great  tutorial to show how to sew  a string block (into a mug rug.)  
What you need:
  • 4-  4" x 4"  pieces of copy paper   (for the foundation.)  
  • Scraps-  1" x 6"  strips    (about 8-10 per block)  Cut them ahead of time
  • 2- 1 1/2 " x 8 1/2 "   fabric  for top border
  • 2-  5" x 8"  lining fabric
  • 2 -  1 1/2 " x 6 "  fabric for handles
  • 2 -  5" x 8"  Pellon FF987  for string blocks  (fuse on after tearing paper away from block)


These mini string block fabric baskets are good for holding my cutting threads and scraps

Three mini string blocks and the Pink Penguin fabric basket

These are just a few ideas for baskets.  I will have more ideas coming up in May.  
  
Amanda  @  The Patchsmith   and Amy  @  Amy Made That!  will be sharing their basket projects and other creative ideas this month, too.  Hop on over to see what they are making !

If you want to see baskets made by our Across The Pond Sew Along group members, hop on over to the Flickr group  .  We'll have a thread going so you can ask questions and get more basket ideas and share your experience.  We LOVE seeing what you make with us!!

By the way, if you need a gift idea for Mother' s Day,  Amy and Amanda's  blogs have lots of patterns that would make beautiful Mother's Day gifts for the special moms, sisters and aunts in your family!  

A-Tisket, A-Tasket,
Won't you make a basket....

I'm off to my sewing room!


Sunday, April 28, 2013

Connectors and Cords Pouch Set


I have been making a lot of pouches lately.  I love making different shapes and styles and trying new patterns for them.

Last week, I  actually made myself a set of pouches.  I had acquired a tangled pile , which included my I Phone usb cord,  ear buds,  camera usb cord , flash drives,  and a spare I Phone  power cord. It was time to get that  all organized .

Fabrics Selected:  various  Denyse Schmidt  DSQuilts   
My favorite is the gray and cream dots!  But I can't walk away from a turquoise zipper!!

Large Pouch:     I decided on the large size of the Open Wide Zippered Pouch,  by Anna of Noodlehead.  I used this tutorial for sizing the large pouch. 
My Open Wide Zippered Pouch    large size

Ear buds:     I used the tutorial by   Erin, of Dog Under My Desk  for my Circle Zip  Earbud  Pouch.  These are so dog-gone cute!   I made a loop in the lining of my big zippered pouch, to attach the earbud pouch to.
    
Zip drives:   A perfect way to use my  "uh -oh,  this pouch is too small for my I Phone with its protective case" , that I made last week.   It was good  practice for putting a snap onto the flap.
I added a circle zip pouch for my earbuds.    Zip drives go in the snapped pouch

Pouches for cords:   Lastly, I  made 3 more smaller  pouches, with zippers , in my coordinated fabrics.  I like to mix and match. 
Three more basic pouches in coordinating fabrics


Mixing up the fabrics
Filling up the pouches


All nestled into the  one big pouch

' Do these dots  make me look fat?.....'


I keep my pouch set right beside my laptop now.  It is easy to find the right cord, and to grab the whole pouch for when I travel!   I can't help but smile when I see these bright colors and some dots!!
I'm off to my sewing room!


I am linked over at  Can I Get a Whoop Whoop!  @ Confessions of a Fabric Addict  
and  Sew Cute Tuesday @Better Off Thread