Showing posts with label The Crafty Quilter. Show all posts

Friday, May 8, 2015

A Spring Petals Finish

In Full Bloom
The Spring Petals Quilt Along at  The Crafty Quilter
This week, I was able to finish up my Spring Petals Table Topper !  This is my second Quilt Along completion in the last few months.  (The first project was my   Irish Chain Twist Quilt , sewing along with Melissa at Happy Quilting.)  Both have been "sew "fun and great learning experiences!


I only had one  "uh- oh" incident while finishing up the topper-

I thought it would be pretty to have a simple fleur-de-lis  pattern quilted  in the corners.   I found  a gray varigated thread, which will blend in nicely with the background fabrics and binding, and still contrast a little  with the yellow corners. 

I appliqued the petals onto the background, using a small  blanket stitch on my sewing machine.

             - Aurifil 50 Wt  cotton from a special box of Color Me Happy  (V and Co.) threads
             - Stencil  -  with fleur-de-lis pattern
             -  Frixion pen   ( iron and it disappears)


My corner is  all marked with a Frixion pen  waterproof pen

Oops!   After I marked it and started to admire the pretty classic shape , I  realized that I had used a waterproof pen that I use for making quilt labels!   My heart sank!
Then I remembered that,  fortunately,  I started to mark the quilting lines on a corner piece of fabric!  (I had originally been  thinking about starting in the center  with something  from the stencil!)
I simply ripped the stitches out from that  yellow corner piece, cut out a new triangle, and replaced it!  Whew!


I used my walking foot to quilt along the lines made with my Frixion Pen


I added this little box in the  the open area around the center flower in green


I couldn't wait to iron the Frixion marks off , after some  simple quilting touches were added to my topper.  (My scrappy fabrics   {Summersville Spring   charm pack }  are pretty busy, so I chose not to compete with the fabric designs and bright colors.)

The binding , with its unusual corners was a initially a bit  intimidating to me, but  Julie's excellent tutorial took me right through the process , in Lesson 5.  { Here }
Now I can tackle this kind of binding!  Thank you , Julie, for your awesome tutorial!

Referring to Julie's tutorial,  I was ready to attach the binding.  I grabbed a cup of coffee, and  sewed the binding 'raw edge' to 'raw edge' on the back side first.  Then , after a good pressing, I held the binding in place with my handy- dandy Wonder Clips.   


I love using these little Wonder Clips  (Clover) for sewing on binding 

I machine stitched the binding on the front side of my topper.   Before  I knew it..... the binding was finished!!


Susie's Sunroom


Spring Petals Table Topper     by Susie's Sunroom


Spring Petals Table Topper    by Susie's Sunroom


This Spring Petals table topper is a great project that can be completed in a week or a weekend, and makes a beautiful gift.   It is truly fun to make!!

Julie,  The Crafty Quilter  ,has  a Link Up showcase ,  where you can see everybody's Spring Petals Table Toppers .   {here}   

It's not too late to get started and make one of your own!  You have until June 6 to enter a Spring Petals topper.   Julie has even added a second  topper pattern... with  no applique!  { Here }     And,  to enter the link up, you don't have to have your topper quilted.  Just have a finished top!

I am going to look over the rest of my  Summersville Spring charms pack, and try to make the non - applique' table topper.    I think my Mother wants this first Spring Petals for her Mother's Day gift!!     


I'm off to my sewing room!


Linking up at:       Spring Petals  QAL @ The Crafty Quilter               and
                           Can I Get a Whoop Whoop @  Confessions of a Fabric Addict  and
                          Let's Bee Social  @  Sew Fresh Quilts    and
                           Fabric Frenzy Friday @ Fort Worth Fabric Studio    and
                            Sew Darn Crafty @ Sew Many Ways

Wednesday, April 15, 2015

Spring Petals QAL

The Spring Petals QAL


Making a  Spring Petals Table Topper along with The Crafty Quilter


Guess what we are making over at The Crafty Quilter, with Julie?

A spring table topper!

We'll be getting the instructions and tutorials on  each Friday, to finish up the table topper on  June 7.


This is one of Julie's table toppers 


So, I am getting ready for Spring  at Susie's Sunroom !

Fabrics:      all from my stash!

          Petals-   16 selected 5 " squares from-   Charm pack of Summersville Spring   by lucie summers for Moda
              
          Background-  for low volume  -  a fat quarter left from a bundle of  This 'N That by Nancy Halverson  by Benartex  AND  some  Grunge   by Basic Grey  Moda  in a cream/gray

            Triangles-   Yellow  Bella  solid  by Moda


 16 charm pack petals  laid out on top of the low volume background
The yellow triangles will be on the sides

I felt that my  Summersville Spring charm pack was too busy to be used as the background fabric.  (Even when I turned them to the back of the fabric, as Julie suggested.)
So I looked in my stash and found this soft gray swirly fabric ( This 'N That) and the gray/cream fabric (Grunge).  I cut them into 5 inch squares ( 8 of each) and pieced them together in rows of 4. 

Julie provides an excellent piecing tutorial on her blog.  { here }  I learned a lot from the week 2 lesson!

The next step in the Quilt-A-Long:   I will be cutting  out and applying the fusible applique' onto the petals!

  It's not too late for you to sew your own table topper,   too!  There's even a variation of the pattern, which has no applique'.    {here }


Look , Ma!  No applique' ! 
I want to make this variation of her  table topper, too!  

I am so happy that it is Spring!

I'm off to my sewing room!


Saturday, December 6, 2014

A Nordic Finish


Click here


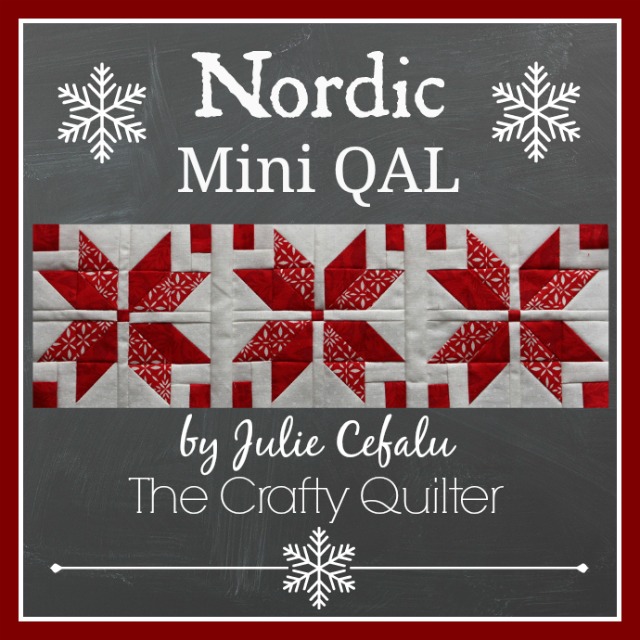
December has been a busy month already! But after  I started sewing , "just one row" , in this adorable Nordic Mini Quilt Along, at The Crafty Quilter ,  I "made time" to finish the other three rows!  ( This mini quilt is definitely "squeeze it in" worthy!!"


Row 1  The Nordic Star

These little  star blocks are about four inches finished , with 25 pieces in each block.

Before I knew it, I had my other three rows made!  The other rows are faster to sew up.
I love the woven texture look that the Norwegian Heart blocks have!

I  decided to bring the gray color into my quilt.  (The Patchsmith added touches of gray to her Nordic Mini Quilt.  I am just a big old   "copy cat.")


Touches of gray in my rows


Simple quilting around the main shape in gray Aurifil Thread


 I used the  Machine Binding Tutorial, by Amy Made That!  and my walking foot .   It took  a lot of ironing , and lots of pinning  before I  started to sew, but the extra preparation paid off.


.


Love those Wonder Clips
Finished quilt size:  14 1/4 in x 14 1/4 in


Nordic Mini Quilt      
Design by The Crafty Quilter


The back side


I really enjoyed making this Nordic Mini Quilt!  I think I will be making another one in January, as my daughter has put in a request.  Julie has also included the sizes and directions for making these blocks in 12 inch sizes, too!    {Click here for the tutorial
 If you make your own, be sure to IG your picture to 
                                                  hashtag #nordicminiqal 

         God jul og godt nytt år
                 
                                  ' Merry Christmas and Happy New Year'   in Norwegian

I'm off to my sewing room!


Linking up to:
                                 Anything Goes Mondays  @ Stitch by Stitch

Wednesday, November 19, 2014

Nordic Cuteness

Nordic Mini Quilt Along


The Nordic Mini QAL
Look what Quilt Along is going on at Julie Cefalu's blog,  The Crafty Quilter

                                            A Nordic Mini Quilt Along!!   

 I was hooked as soon as I saw these cute little snowflake blocks, and ran to find some red and white fabric.
It is a mini quilt, that will meaure 14 1/2 inches square,  and will have 4  rows.

I had such fun making the  Half Squre Triangles for these little blocks.  There are a few reasons for this...

  • I love that they are going to be 4 3/4  inch square blocks
  • I have been testing some adorable quilt patterns, using many HST, and have gotten much better making those HST  ( Elaine, Summercrafter is designing up cuteness!)
  • I used the tiny LocBloc ruler, that make trimming HSTs  so easy and accurate.  ( I splurged awhile back and got a set ranging from 1 1/2 in to 6 1/2 in.  I LOVE THEM!)


Trimming to 1 1/2 inches with the Bloc Loc Ruler


Julie's tutorial is excellent, and before I knew it, I had one block finished.  I had to take my time pressing the seams open, but it was well worth the extra step.  I did not use steam!  


My first block   in the Nordic Mini Quilt     not perfect, but cute


Row 1                         by Susie's Sunroom


Think you have a bit of time to fit  squeeze in a Nordic mini?   Hop on over to The Crafty Quilter for the tutorial!  Be sure to  use the hashtag  #nordicminiqal  on IG to post your blocks.   I am on IG  SusiesSunroom


These little blocks warm my heart... even on the coldest winter day!  I can't wait to see what we will be making next week!


I'm off to my sewing room!

Friday, November 1, 2013

November Across The Pond Sew Along Project


November's Across The Pond Sew Along Project


One Year  for   Across The Pond Sew Along!!


November... the perfect time to join in and make a project  with us
in this fun and idea-filled sew along!
I can't believe that it was one year ago that we began our Across The Pond Sew Along group!   Amanda,  The Patchsmith,  and Amy, Amy Made That!, and I wanted to make fun projects monthly , and to make new friends along the way.   ( I also wanted some "creativeness" to "rub off onto me" , from being around Amy and Amanda and their friends and followers.)

Your might remember our first project, back in November 2012.  Amy chose the Anita Vacation Tote Bag~
November 2012 ATPSA Project  Anita Vacation Tote
This is my own version of the Anita Vacation tote~
My Anita Vacation Tote Bag   Susie's Sunroom

 
Since then, our group has made a lot of projects!   And our Flickr Group has grown to 59 followers , with 231 pictures!  Pictures of projects have been submitted by 26 different quilters!  I just love seeing the projects that you have put into the group to share!  Thank you so much for sewing along us.  I am inspired by your work and creativity and talent!


Now it is time to see what Amy has selected for this month's theme:   Apples!!
The  Apple theme... can mean make any kind of apple  or use  any apple fabrics...  something to do with apples.
I loved this idea, and really loved it when I started looking through all of my stash for any red and green fabrics.  Because I found some apple fabric that I had used to make a purse.

Fabrics:   Apples  -Timeless Treasures
               Red plaid -  Timeless Treasures
              Green gingham-  Cotton Blossoms  Dill Dot Plaid    Moda
               Green -  Nature's Christmas  by  Sandy Gervais for Moda Fabrics
               Cream blender-     Molly B's Studio  by Marcus Fabrics

My fabrics  ... yummy!
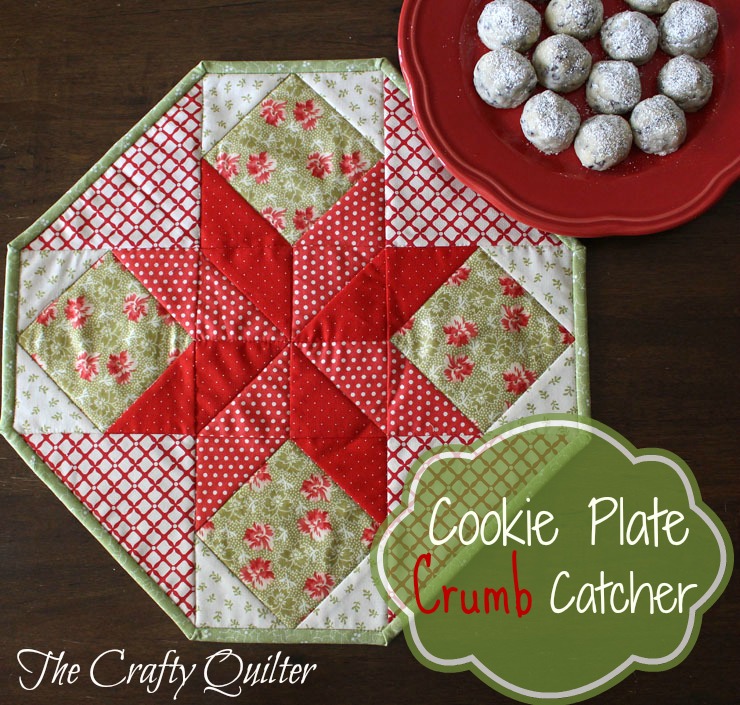
My  Project :   Cookie Plate Crumb Catcher    by Julie C , The Crafty Quilter blog

Super cute pattern  for a Cookie Plate Crumb Catcher    by The Crafty Quilter
photo courtesy of The Crafty Quilter

Julie's  blog featured a pattern for a Cookie Plate Crumb Catcher table topper, in gorgeous Christmas fabrics, in mid-October. I could just see my  apples in the squares in this pattern.   Julie gives  us a tutorial showing exactly  how to make it !  This is awesome because I had no idea how to make it on my own!

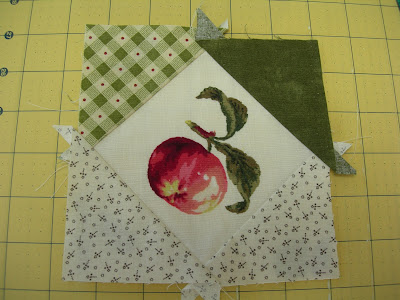
I fussy cut my squares, to feature one apple in each square.   I used Fons & Porter Fussy Cutting Templates, that had the center marked on a clear square. It was so easy to see where to cut each 5 1/2 inch square.  (I have had these templates for 2 years and never really used them before.)                ** These are 50% off at Joann.com through Sat.**
Back side  of a square in a square    

 Julie also has an awesome tutorial for making a Perfect Square in Square.  I loved using this method, as it is like paper piecing the corners onto a square.
This method left room for seam allowances at the four corners
I used the 45 degree angle on my 3 x 18 inch Omnigrid Ruler, to trim my HST squares
Laying out the pieces for the topper
Yep.... love that red plaid in the corners!

One of the square in square blocks 
I was happy with my piecing together of the top.  I  see a few places that aren't meeting perfectly. But,  I hope to improve on them when I make my next crumb catcher. This is a fun pattern to make.

Julie 's tutorial also  shows  how to make the angled binding. (Thank you, Julie!)   I machine quilted it on... but to the BACK side first.  Why did I do that???  I don't know why.  ( I marked this on my notes!)
My next crumb catcher,  I will sew the binding on to the front first, and then  most likely hand sew the binding to the back.  

The back of the crumb catcher.  You can see where I stitched in the ditch to feature the pinwheel

The Cookie Plate Crumb Catcher 

I love the green inner pinwheel

For more creative and beautiful apple project ideas, hop on over to Amy's blog,  Amy Made That!,  and Amanda's blog, The Patchsmith .  We will be putting our project pictures in the Across The Pond Sew Along Flickr group.  We'd love for you to put your apple project in there,too!  (Or any Across The Pond project you have made.)


This was such a fun project to make.  I hope to put up some more "apple" ideas on my blog in November , too.   


I'm off to my sewing room!


Linking up at Can I Get a Whoop Whoop! @ Confessions of a Fabric Addict    and
                      TGIFF @  Quilt Matters


PS
If you would like to see some more beautiful variations of The Crafty Quilter's  Cookie Plate Crumb Catcher pattern,  go on over to see Sheri's blog at Sunshine in the Attic.  She has several beautiful crumb catchers in seasonal fabrics.  
Sheri's crumb catchers:
photo by Sheri at  Sunshine in the Attic blog

photo by Sheri at Sunshine in the Attic blog